Use the new Access Pricing Zones to create zones that specify prices for specific Items, Sites, and Customers.
| Access |
| Grant permission to User Profiles in Access User Profiles > select a User Profile > Menu Security > Inventory > Main Menu > Pricing. |
| Grant permission to User Profiles in Access User Profiles > select a User Profile > Security > Inventory > Pricing > Access Pricing Zones. |
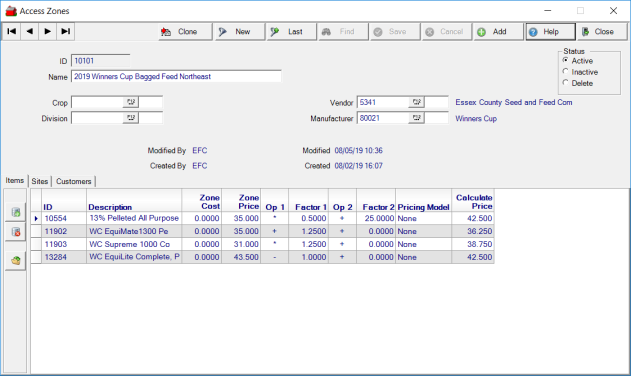
Enter a required ID of up to 10 alpha-numeric characters and an optional Name of up to 40 alpha-numeric characters. A Vendor or a Manufacturer is required for a Pricing Zone and can be populated by entering a Vendor and Manufacturer ID or by using F12 to search.
Both the Crop and Division fields are optional.
Add Items Individually
Use the Items tab to associate the items with the Zone individually by selecting the  icon and enter the item ID or use F12 to search.
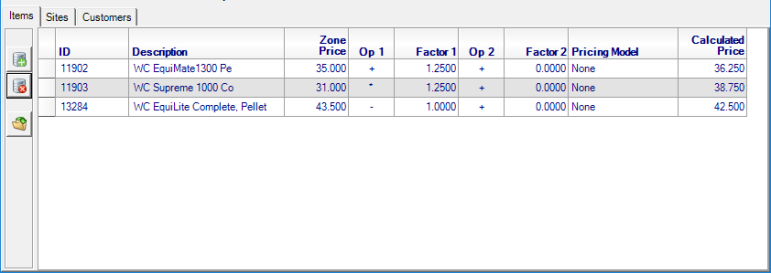
To create the Calculated Price, enter a Zone Price, an Operator 1, Factor 1, Operator 2, Factor 2 and choose a Pricing Model, if appropriate. When adding Items individually, the formula used for the Calculated Price can be entered for each Item.
Add Items by Import
Items can be added to the Pricing Zone using an import and the pricing formula for all items in the file can be set. Select  to access the Import Zone Item Info window and click the Choose File button to select the comma-delimited text file that contains the item information.
The import file should contain the Item ID, Item Description, and Zone Price.
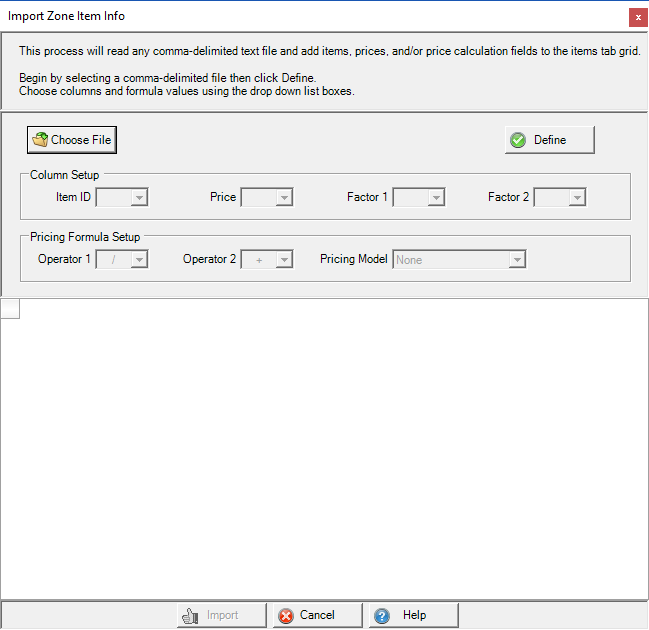
Use the Define button to indicate what columns in the spreadsheet contains information for item fields. Use the Column Setup section and Pricing Formula Setup sections to define the pricing formula for all items within the file. Click Import to add the items and formula to the Items grid. A Pricing Formula is not required for a successful import and can be added per item after the import completes. If an import has been unsuccessful, an error report will be generated.
Add Sites
Once Items are added to the Pricing Zone, a minimum of one Site is required. Add one Site by selecting or click  to use the available Tagging function.
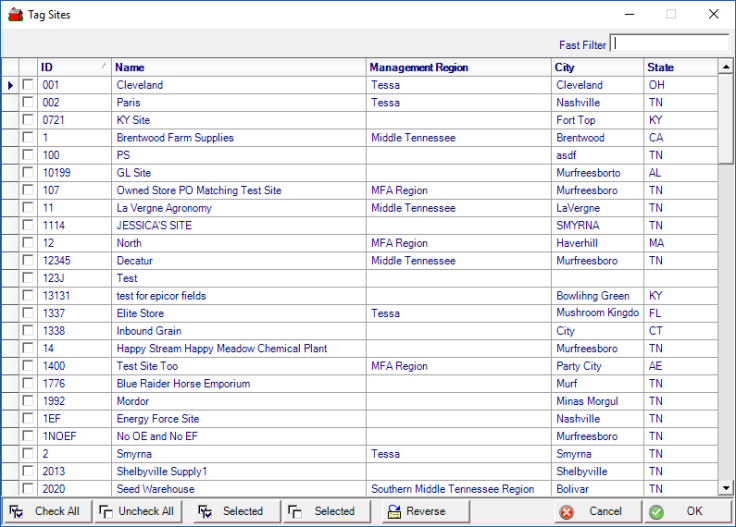
Use the check box to the left of the ID column to select the Site or use the Check All button at the bottom of the window. Complete the addition of Sites to the Pricing Zone by clicking OK.
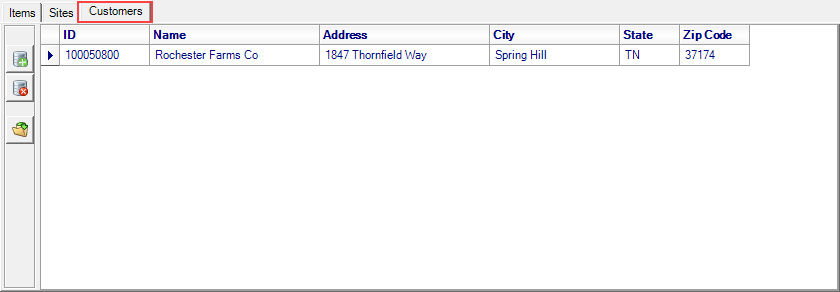
Add Customers
Pricing Zones will be associated with Customer accounts when the Site ID selected for the Zone matches the Responsible Location on the Customer account. Additional Customer accounts can be added to a Pricing Zone individually or by importing a comma delimited text file. Adding customers to a Pricing Zone is optional.
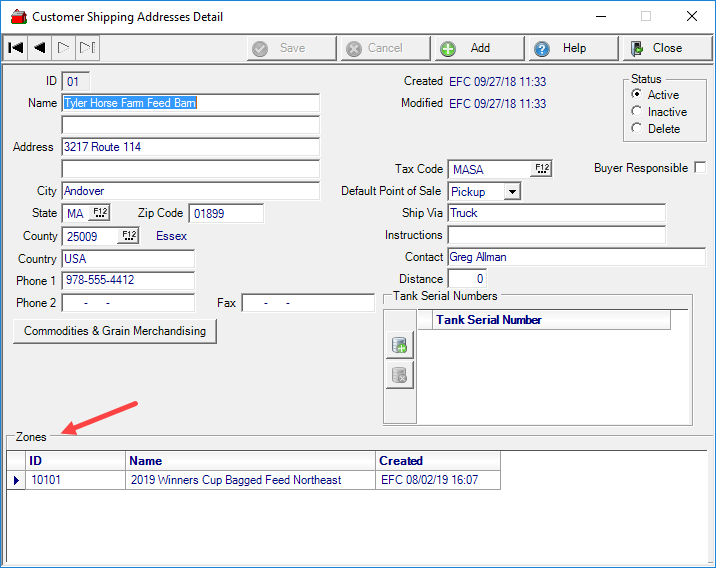
View the Pricing Zone(s) associated with customer accounts by navigating to AR > Access Customer detail > Ship To.
Clone an Existing Pricing Zone
Make a copy of an existing zone by using the Clone button by first using the Find button to select the existing Pricing Zone then select the  button.
Enter a new ID, Name, Vendor, or Manufacturer and the optional fields of Crop and Division.
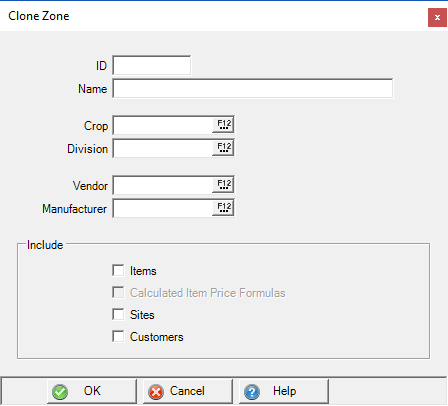
Use the Include section to clone Items, Site, and Customers. Calculated Item Price Formulas becomes available if Items is selected. Click OK to complete the clone process.
Access Manufacturers
As Items are selected in a Pricing Zone when a Manufacturer is selected, the new Items and Zones tabs found in Setup > Access Manufactures becomes populated.
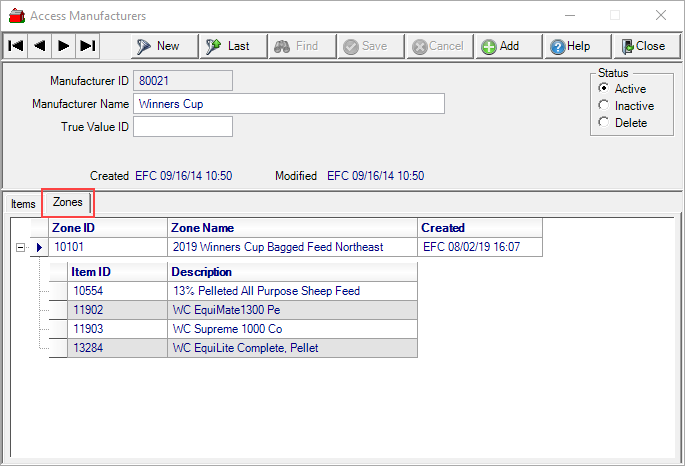
The Items tab also is populated with new items when the Manufacturer is added in Item detail.
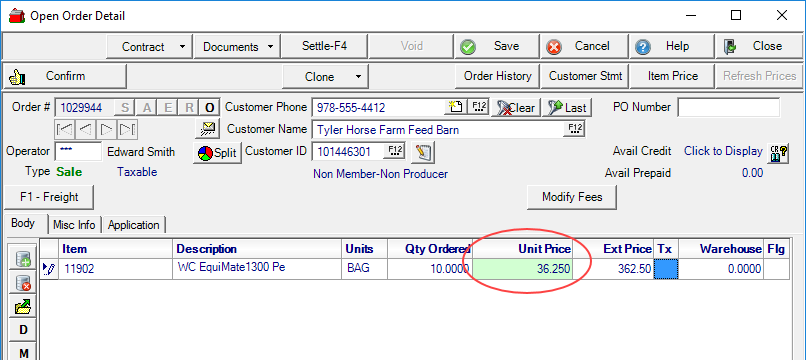
Zone Pricing Applied to Orders, Batches and Prepaids
In Orders, Batches and Prepaids, when the Customer and Item contained in Zone Pricing match, the Calculated Price defaults as the Unit Price.